
git
git 学习
开始
安装
初次安装 git 配置用户名和邮箱
1 | $ git config --global user.name "你的名称" |
git 使用 ssh 密钥
初次使用 git 的用户要使用 git 协议大概需要三个步骤:
1.生成密钥对 2.设置远程仓库(本文以 github 为例)上的公钥 3.把 git 的 remote url 修改为 git 协议
1.生成密钥对
1 | $ cd ~/.ssh |
截图本机已经生成过公钥了
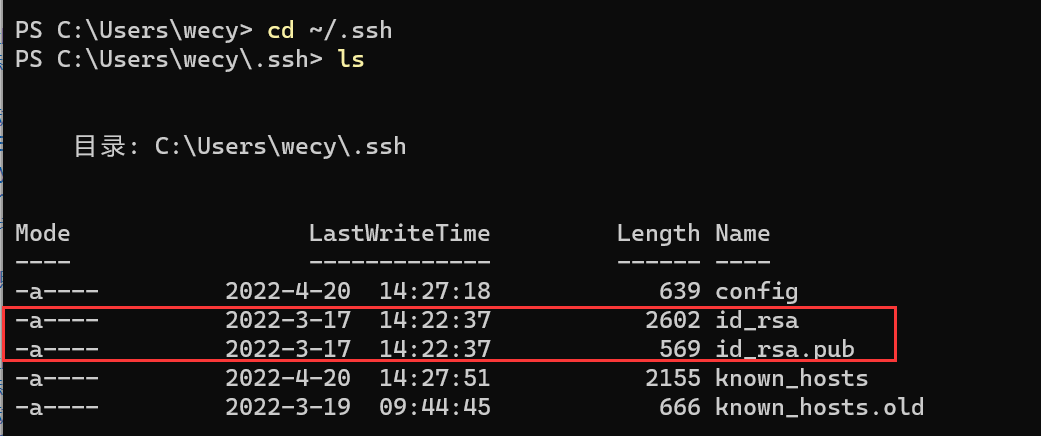
文件说明:
id_rsa: 公钥
id_rsa.pub: 私钥
如果没有存在这个两个文件,则需要生成秘钥
1 | $ssh-keygen -t rsa -C "你的邮箱" |
直接按 Enter 就行。然后,会提示你输入密码,如下(建议输一个,安全一点,当然不输也行,应该不会有人闲的无聊冒充你去修改你的代码):
1 | Enter same passphrase again: [Type passphrase again] |
完成自动生成文件
1 | Your public key has been saved in /home/you/.ssh/id_rsa.pub. |
2.设置远程仓库
- 1.查看你生成的公钥
1 | $ cat ~/.ssh/id_rsa.pub |
- 2.配置公钥
- 登陆你的 github 帐户。点击你的头像,然后 Settings -> 左栏点击 SSH and GPG keys -> 点击 New SSH key
- 然后你复制上面的公钥内容,粘贴进“Key”文本域内。 title 域,自己随便起个名字
- 点击 Add key
完成以后,验证下这个 key 是不是正常工作:
1 | $ ssh -T git@github.com |
看到这个Hi xxx! You've successfully authenticated, but GitHub does not # provide shell access.
恭喜你,你的设置已经成功了。
阿里云配置失败
阿里云拉取代码失败处理
C:\Users\wecy.ssh 在这个目录下新建 config 文件
添加如下代码
Host *
HostkeyAlgorithms +ssh-rsa
PubkeyAcceptedKeyTypes +ssh-rsa
3.创建 github 项目
新建项目分 2 种情况:
1.本地没有项目代码。 2.本地已经存在项目代码,只是想放到 github 托管。
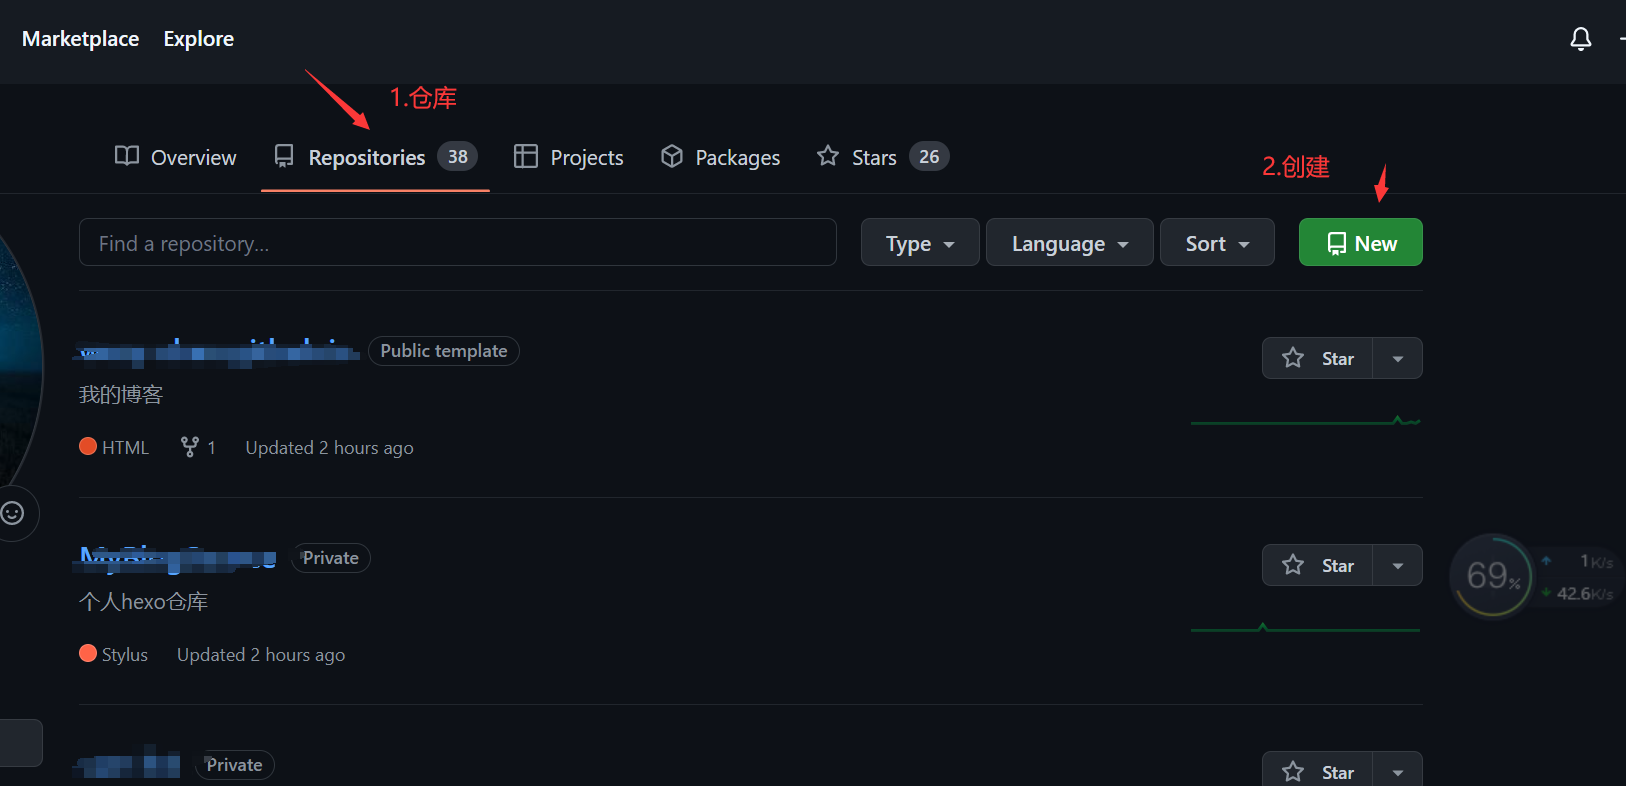
创建仓库
登录你的 github 账号,来创建远程仓库(如图)
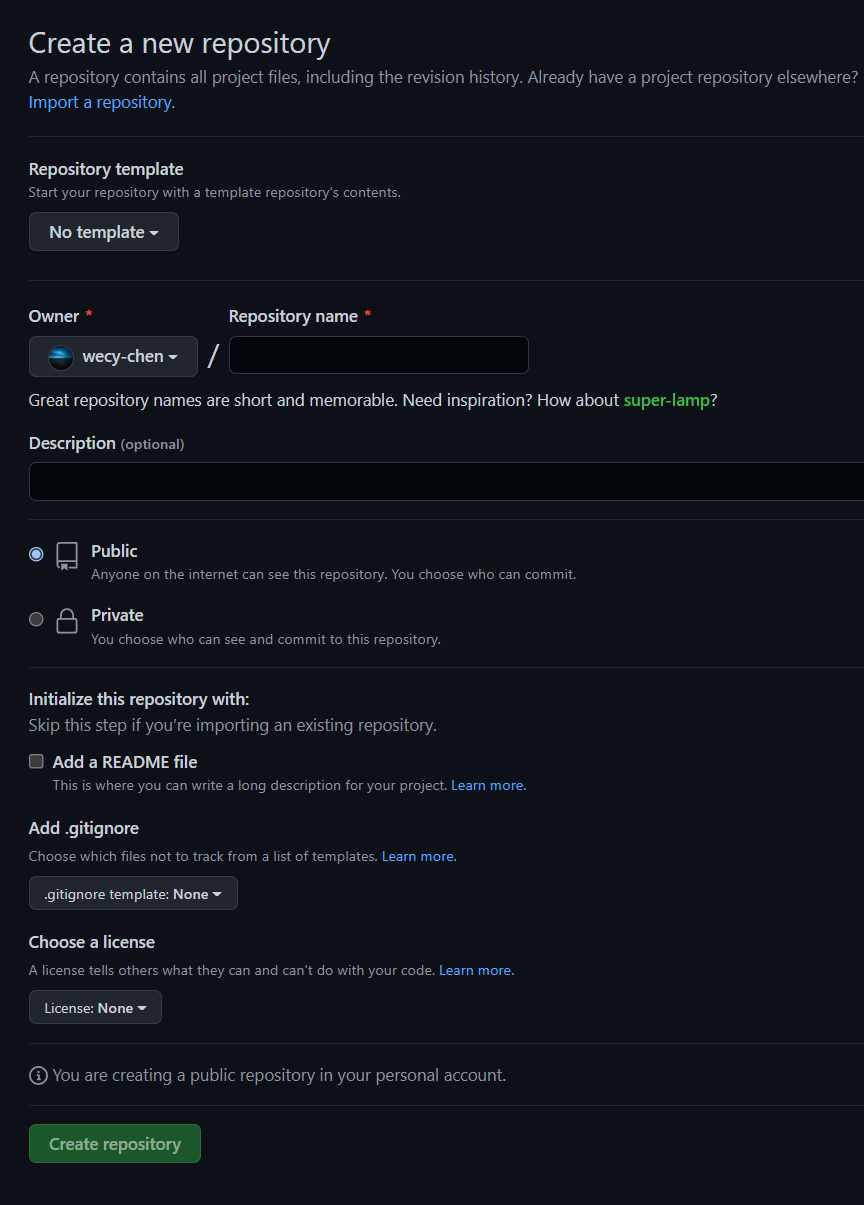
- 由上往下输入你项目的名字、项目的描述,选择这个项目是不是公开(Public)或是作为私人项目(Private)。
- Initialize this repository with a README 这个选项是问你要不要帮你根据你输入的项目名字和描述初始化一个项目(生成一个 README 的 md 文件)
- 再接下来是问你要不要添加项目的忽略文件(.gitigore)还有要不要为你的项目增加一个许可证(license)。
- 上面的根据你自己的实际需要填完和选择即可,然后点击绿色的按钮就会创建一个项目仓库了。
- 然后就会跳转到你项目的一个主页。
本地没有项目代码
可以在本地创建一个空白的文件夹,然后克隆刚刚创建的项目(ps: clone url 在项目主页的右下方位置可以找到)本地,然后添加代码再上传。
1 | mkdir project |
然后就是 git add 和 git push 相应的操作。
本地已有项目代码
本地已创建了项目,需要提交到 github 上
- 在你的项目文件目录先执行命令
git init,使之成为一个 git 仓库。 - 将项目里所有文件加到本地的仓库,使用以下命令:
git add .,git commit -m "提交信息 - 然后将 github 上的项目 pull 下来
git pull https://github.com/github名/项目名.git - 为版本库添加名为 origin 的远程版本库
git remote add origin https://github.com/github名/项目名.git - 执行推送命令,完成 GitHub 版本库的初始化(注意命令行中的-u 参数,在推送成功后自动建立本地分支与远程版本库分支的追踪)
git push -u origin master
4.修改远程地址
使用命令 git remote -v 查看你当前的 remote url (线上项目远程地址)
1 | $ git remote -v |
修改命令:
1 | $ git remote set-url origin git@github.com:github名/新的项目名.git |
先删再添加
1 | $git remote rm origin |
5.删除项目
进入项目设置,拉到最后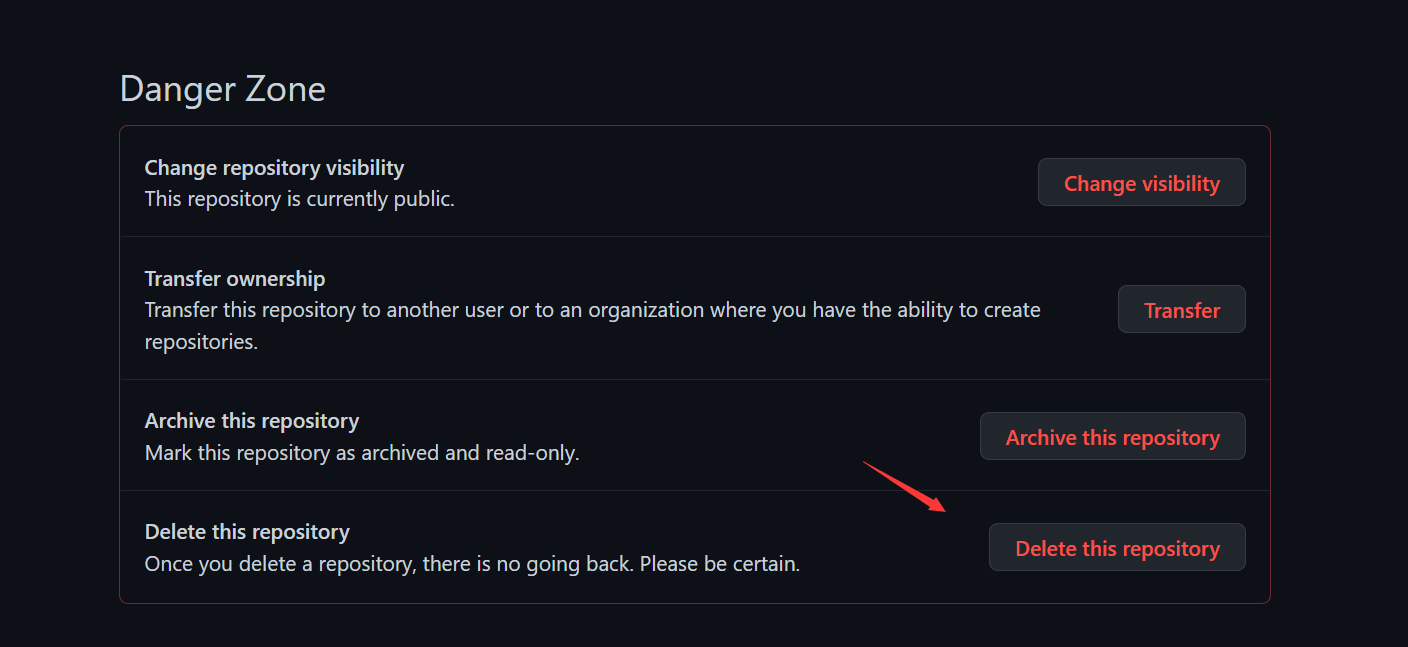
命令
git 重置 commit 时的注释
注意:在未push的情况下:
方法一: git commit --amend (修改 commit 提交内容)
方法二: git reset --soft (倒数第二次 commit 的 commit_id”,然后重新 git commit -m “….”)
强制覆盖本地代码
git fetch --all (拉取所有更新,不同步)git reset --hard origin/master (本地代码同步线上最新版本(会覆盖本地所有与远程仓库上同名的文件))git pull (再更新一次)
git fetch --all && git reset --hard origin/master && git pull 单条执行
git reset --hard origin/master 就这一条也行
新建新分支
git branch 分支名新的分支名
git checkout 分支名切换到分支
git checkout -b 分支名创建并切换分支
git push --set-upstream origin 分支名提交分支
更新远程分支列表
git remote update origin --prune
注意:如果你的 remote branch 不是在 origin 下,按你得把 origin 换成你的名字
git branch -a
查看所有的分支(含远程分支)
git checkout -b main origin/main
切换线上分支 origin/main,建立本地 main 分支
分支修改
- 重命名 git 本地分支
git branch -m 新分支 (当前分支的修改)
git branch -m 老分支 新分支
- 重命名 git 远程分支
前提 是本地已拉取远程分支
git push --delete origin 远程分支 (删除远程分支,也可以不删)git branch -m 老分支 新分支 (重命名本地分支)git push origin 新分支 (推送本地分支)git branch --set-upstream-to origin/新分支 (将修改后的本地分支与远程分支相关联)
然而,在 github 上操作的时候,我在删除远程分支时碰到这个错误
1 | $ git push --delete origin devel |
这是由于在 github 中,devel 是项目的默认分支。要解决此问题,这样操作:
- 进入 github 中该项目的 Settings 页面;
- 设置 Default Branch 为其他的分支(例如 master);
- 重新执行删除远程分支命令。
分支删除
git branch -d branch_name 删除本地分支
git push origin --delete branch_name 删除线上分支
撤销和回滚操作
- 撤销 (未
git add操作)
git checkout fileName 撤销修改文件git checkout . 撤销全部文件
回退
git reset --hard HEAD^回退到上个版本git reset --hard HEAD~n回退到 n 个版本之前git reset --hard commit_id回退到指定 commit 的 id 位置拉指定分支
git cherry-pick commit的ID合并特定提交ID (多个ID,隔开)
强推到远程:(可能需要解决对应分支的保护状态)
- 强制提交到对应 id 版本分支记录
注: 无法撤回,谨慎操作
git push origin HEAD --force
强制忽略跟踪
一、本地忽略
在文件上右键添加进 忽略文件
或者手动在 .gitignore 文件中添加文件路径
这样在 git 仓库已有的文件不生效,依旧会被检测到
二、强制忽略跟踪
git update-index --assume-unchanged 文件路径
git update-index --assume-unchanged src/test/test.http
取消强制忽略跟踪
git update-index --no-assume-unchanged 文件路径
github 无法提交
git pull
ssh: connect to host github.com port 22: Connection timed out
fatal: Could not read from remote repository.
Please make sure you have the correct access rights
and the repository exists.
sh -T git@github.com检查 SSH 是否能够连接成功
ssh: connect to host github.com port 22: Connection timed out超时
打开 C:\Users\wecy\.ssh
打开config文件,输入以下内容,保存后即可 (没有的用新建记事本,去掉.txt 后缀)
输入以下内容
Host github.com User xxxxqq.com Hostname ssh.github.com PreferredAuthentications publickey IdentityFile ~/.ssh/id_rsa Port 443
ssh -T git@github.com验证选择 yes
github 访问配置
当无法访问 github 时,可以设置 host 配置
windows 路径:C:\Windows\System32\drivers\etc
1 | # Copyright (c) 1993-2009 Microsoft Corp. |
1 |